With the update of the popular Windows Operating system to version 7 and the more common usage of 64-bit capable systems comes the need to update the tools used for detecting and installing Digi PKG-E radios.
There are two tools used for this process. One is for detection and the other for the Ethernet to Serial driver installation.
Lantronix Device Installer (91 MB)
Lantronix CPR v4.3 (64MB)
Once you have downloaded and installed the two programs please follow the following instructions for configuration of the PKG-E:
Device Installer
This utility will find the radio on the network and allow the user to change the IP address of the radio to match the subnet of the local network. This step may be skipped if the radio has already been configured for the network it is attached to.
-
Connect radio to Ethernet network and verify that it is ON
-
Locate and open Lantronix Device Installer
-
Click on Search to find device on network
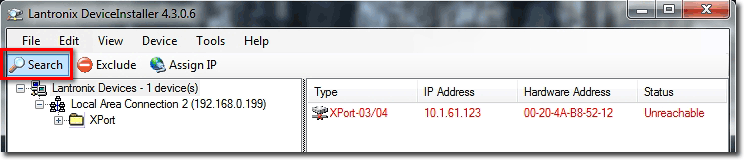
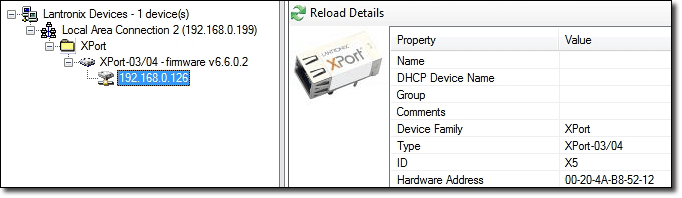
The radio will be detected and should appear in RED in the right-hand column. This signifies that the radio is not on the same subnet as the computer.
-
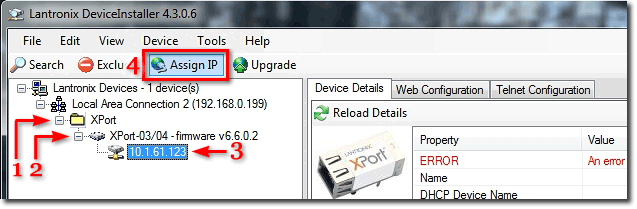
Click on the + next to the XPort folder in the left hand column.
-
Click on the + next to the XPort-03/04 icon. This will reveal another icon that is labeled with an IP address.
-
Click on the IP address of the device.
-
Click the Assign IP button. This will open a new window.
-
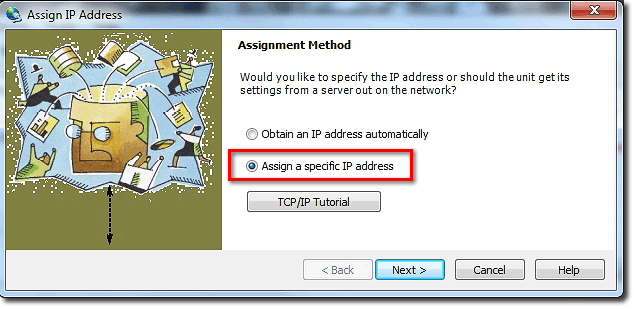
The next window will show two options. Please select Assign a specific IP address then click Next.
-
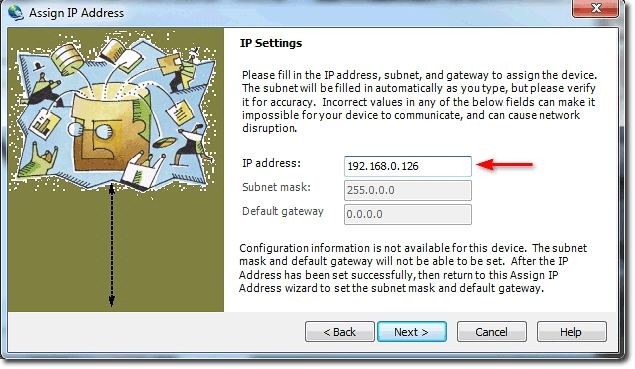
The next window will allow manual assignment of IP settings for the radio. Please see your network administrator for appropriate network settings. When finished, click Next.
-
Click on the Assign button. This will then start the process of reassigning the radio a new IP address.

-
Once the radio has received a new IP address, a “Completed Successfully” message will appear.

-
Click on the Finish button. This will take you back to the original screen.
You should now see all the settings in the right-hand section are in black. This signifies that the radio is now part of the local network subnet.
CPR Manager
Once the device is part of the local network, CPR Manager is able to assign a COM port to the IP address of the device and create a driver that will allow the device to be treated as a regular COM port.
-
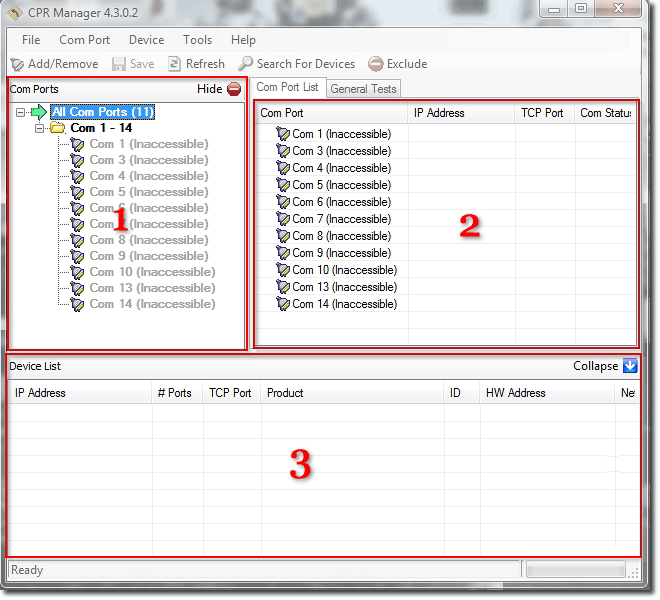
Locate and Open Lantronix CPR Manager. When CPR Manager opens, you will see 3 distinct sections.
-
Click on Add/Remove. You will be presented with a COM port selection screen.

-
The COM port selection page will appear. Please select a COM port (1) by clicking on a check box and then clicking on OK (2).
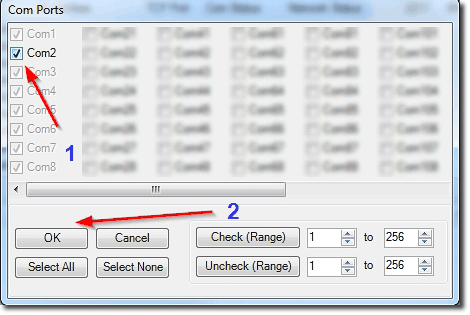
We suggest avoiding COM 3. This tends to cause some issues when running Windows OS.
-
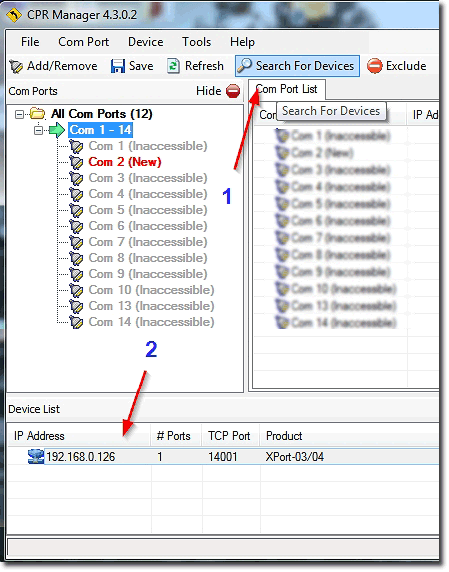
Click on Search For Devices. The device will appear in the bottom section.
-
Left click on the newly created COM port (1). Then right click on the IP address of the device located in the Device List (2). Left click on Add To Settings (3).
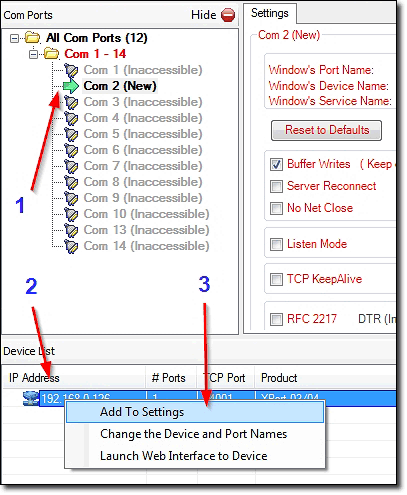
-
The device IP address will now appear under the COM port settings in the right column (1) in red. Click on Save (2).
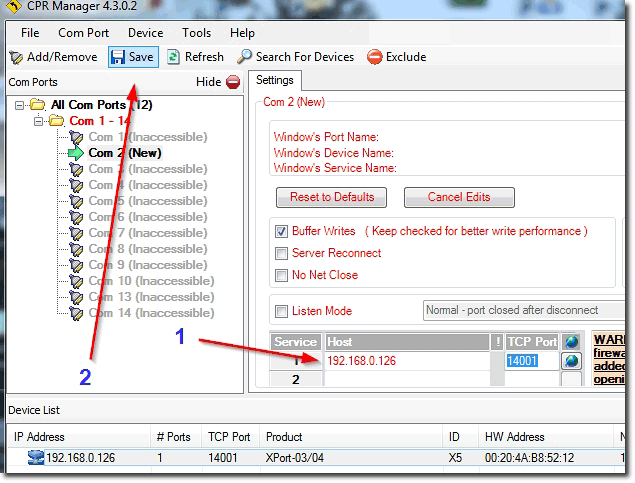
A warning box may appear stating that the driver is unsigned. Click on Continue Anyway. This may happen twice.
-
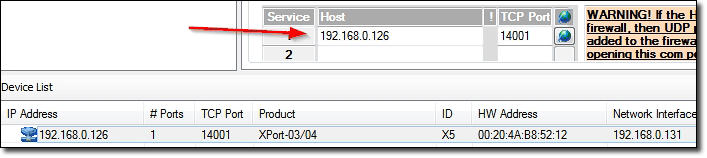
The IP address that was once red should now be black. This signifies that the settings were accepted and a driver has been created linking the created COM port with the radio IP address.
Close down all Lantronix software and open X-CTU. The new COM port will now be visible to X-CTU.
Last updated:
Aug 08, 2017